Seam Welding for Cleanrooms
Rubber Tile and Sheet Flooring
Products
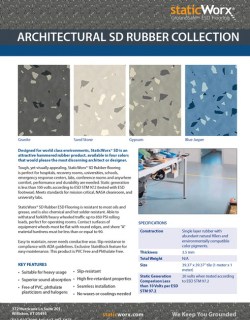
- Architectural SD Rubber
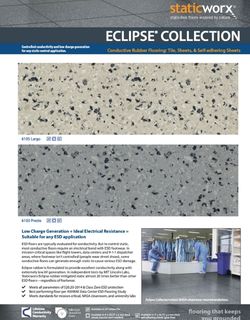
- Eclipse Electrically Conductive EC – and GF (glue free) – Rubber
- Eclipse Glue-Free (GF) Rubber
- StatLock Interlocking Static Dissipative (SD) Rubber Tiles
- Aisle-Safe SD and EC Rubber Runners & Mats
Information
- Advantages of Electrically Conductive (EC) Rubber
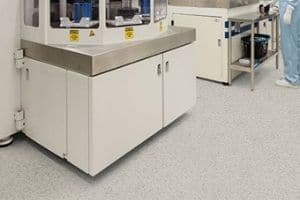
- Cleanrooms & Labs: Why We Love This ESD Flooring System
- Don’t Choose Your Floor Until You Understand The Role of Footwear
Installation, Cleaning, Sustainability
Heat Welding
After the flooring is installed, following the appropriate installation guide, wait a minimum of 24 hours for all “wet adhesives” to cure before beginning the heat welding process. If using the StaticFix dry adhesive system, welding can begin immediately after the flooring is installed.
- To prepare the seam for welding, it must be grooved using either a mechanical joint cutter or hand-grooving tool. The depth of the groove shall be controlled at approximately 2/3 of the thickness of the flooring material. The width of the groove after cutting shall be no less than 3mm and no greater than 3.5mm.
- After the groove is confirmed to be free of any debris, pre-heat the welding gun to obtain the correct heat setting of 350°- 400°C (662° – 752°F). It is recommended to practice welding on a piece of scrap flooring material to determine the exact heat setting and speed.
- Cut a length of heat weld rod sufficient to weld the entire length of the seam, plus approximately 6″ extra
- Weld the seam starting at the wall and apply slight pressure to the gun nozzle to force the melting rod into the groove.
- Properly inserted, the heat weld rod will have a slightly flattened portion on either side. Allow the rod to cool to the touch and begin trimming or “skiving” to remove the excess weld. To help prevent scratching or scuffing of the flooring during skiving, it helps to use a 1 part liquid soap to 10 parts water solution and apply using a clean cloth to the welding rod and to at least 2″ (1″ each side).
- Using the trim plate and skiving knife, make the first cut across the weld rod (a Mozart trimming knife with the 0.7mm spacer claw can also be used), and allow the weld rod to fully cool to room temperature.
- Next using only the skiving knife or Mozart (without the spacer claw), finish trimming the remainder of the weld. The finished weld should be smooth and on the same plane as the floor covering.
- Occasionally, there may be excess weld rod left after the final trim and it will be necessary to remove this using a “melting” technique. After heating up a non-sharpened metal putty knife, gently glide the putty knife (held as if scraping) along the seam weld. Excess weld material will collect on the knife and the result will be a smooth and flat seam weld.
- Heat welding should not be used vertically or when welding to sanitary base. If required, these shall be cold welded.
Cold Welding (Liquid Wax Method)
After the flooring is installed, following the appropriate installation guide, wait 8 hours for all “wet adhesives” to cure before beginning the cold welding process. If using the StaticFix dry adhesive system, welding can begin immediately after the flooring is installed.
- The use of gloves when using cold weld is recommended.
- Cold weld shall be used on all vertical corners (do not heat weld vertical corners), or if specified.
- To prevent bonding of the cold weld outside of the seam, using a clean cloth apply a thin layer of liquid wax to both sides of the seam (4″ total), and allow to fully dry.
- To prepare the seam for welding, it must be grooved using either a mechanical joint cutter or hand-grooving tool. The depth of the groove shall be controlled at approximately 2/3 of the thickness of the flooring material thickness. The width of the groove after cutting shall be no less than 3mm and not greater than 3.5mm.
- Clean, vacuum or blow out the seams.
- Cut off the tip of the cartridge at the first thread, screw on the nozzle and place the cold weld cartridge into a cartridge gun. Cut off the nozzle tip at an angle
- Inject the cold weld into the seam without gaps until a small bulb develops (approximate size of untrimmed heat weld rod) above the seam. At the end of the seam, release the gun to prevent any leaks
- Press the cold weld into the seam using a smoothing spatula, held nearly flat (approximately a 22° angle), resulting in a flush surface (neither high nor concave). Excess cold weld will be pressed away on each side of the seam. It is important to develop a slight gap between the excess weld and weld in the seam, for easy removal of the cured excess.
- Cold weld develops a skin after approximately 20-30 min. at 20ºC (68ºF) and a humidity of 50%. The skin formation is accelerated by higher temperatures and humidity, and slowed correspondingly by lower values.
- The excess cold weld can be removed after approximately 8-12 hours (depending on temperature and humidity).
- Prevent traffic on the seams until the cold weld has cured (approximately 8-12 hours). The full carrying capacity (chair casters, etc.) is given after approximately 72 hours.
- Any cold weld tracked or spilled onto non-waxed areas shall be removed immediately using liquid wax or isopropyl alcohol and a clean cloth. Removal at a later stage is not possible.
Information and Downloads
- Installation Instructions
- Warranty
- Sustainability Information
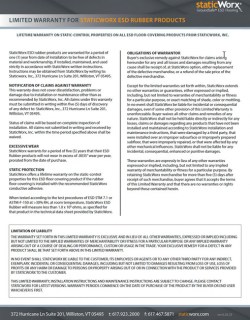
Staticworx ESD rubber products are warranted for a period of one (1) year from date of installation to be free of defects in material and workmanship, if installed, maintained, and used strictly in accordance with Staticworx written instructions.
EC ESD Rubber Tile/Roll Sustainable, Green Technology
- May qualify for LEED credits including:
- LEED MR Credit 6: Rapidly Renewable Materials
- LEED MR Credits 4.1 and 4.2: Recycled Content
- LEED MR Credits 1.1 and 1.2: Building Reuse
- 10% post industrial waste
- Contains no PVCs or halogens
- Phthalate-free
- Flooring and Adhesive: Low VOCs / off gassing of benign emissions
- Stainblock ™ surface eliminates the use of wasteful and environmentally unfriendly floor waxes, finishes, polishes and strippers.
- Contains 5% renewable natural rubber
- Recyclable Packaging
- Eco-friendly manufacturing methods
- Durable, long-lasting
- Low maintenance: damp mop only
- Free of solvents
- Product can be 100% reused: when installed using Staticworx dry adhesive with Planus Primer, rubber tiles can be removed and reused
- PVC free
Further Reading
Most static control specifications over-emphasize whether a floor is “conductive” or “static dissipative.” Since ANSI/ESD S20.20, that sort of calculus is no longer relevant.
Standards for ESD floors in electronics manufacturing and handling services (EMS) are stringent. Learn how to choose the best ESD floor for your space.
In this hub, focused specifically on installation and maintenance, you’ll find accurate information on grounding, installing, and maintaining ESD flooring.
Get in Touch
The form below will help us better understand your needs and get you as quickly as possible to the right person. We look forward to helping you solve your static problem!
You can expect a response within 24 hours. For faster service, please give us a call: 617-923-2000
"*" indicates required fields
Visit our privacy policy to find out how we process data.

StaticWorx high-performance static-control floors protect electronic components, explosives, and high-speed computers from damage caused by static electricity. ESD flooring is part of a system. Choices should always be based on objective, researched evidence. When you partner with us, we look at all possible items that may need to integrate with the floor, and, focusing on your goals and objectives, help you find the right floor for your application.
Flooring Products

We accept these major credit cards.
Get in Touch
East Coast: 617-923-2000
Email: [email protected]
“I’m so glad we were able to find an attractive solution that didn’t leave us with some run-of-the-mill ugly disaster.”
Unless otherwise stated, standards referenced are the most up-to-date versions.
Share This
subscribe to newsletter
Sign up for our newsletter and occasional updates.
The FAA has updated its standard for facilities and electronic equipment. StaticWorx meets all requirements for ESD flooring.
Flooring Products

We accept these major credit cards.
“I’m so glad we were able to find an attractive solution that didn’t leave us with some run-of-the-mill ugly disaster.”
Share This
Get in Touch
East Coast: 617-923-2000
Email: [email protected]
subscribe to newsletter
Sign up for our newsletter and occasional updates.
The FAA has updated its standard for facilities and electronic equipment. StaticWorx meets all requirements for ESD flooring.
Unless otherwise stated, standards referenced are the most up-to-date versions.
Flooring Products

We accept these major credit cards.
Get in Touch
East Coast: 617-923-2000
Email: [email protected]
“I’m so glad we were able to find an attractive solution that didn’t leave us with some run-of-the-mill ugly disaster.”
Share This
subscribe to newsletter
Sign up for our newsletter and occasional updates.
The FAA has updated its standard for facilities and electronic equipment. StaticWorx meets all requirements for ESD flooring.
Unless otherwise stated, standards referenced are the most up-to-date versions.
All rights reserved. © 2008-2024, StaticWorx® GroundSafe™ ESD Flooring. Privacy Policy


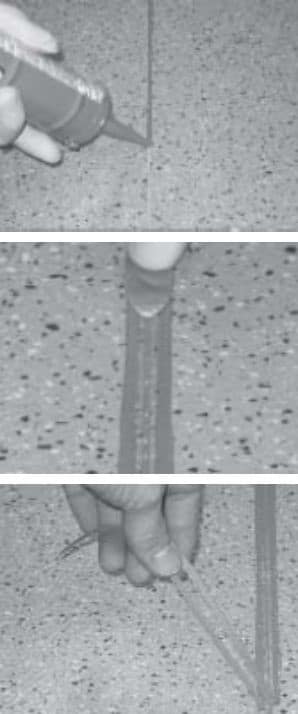
 After the flooring is installed, following the appropriate installation guide, wait 8 hours for all “wet adhesives” to cure before beginning the cold welding process. If using the StaticFix dry adhesive system, welding can begin immediately after the flooring is installed.